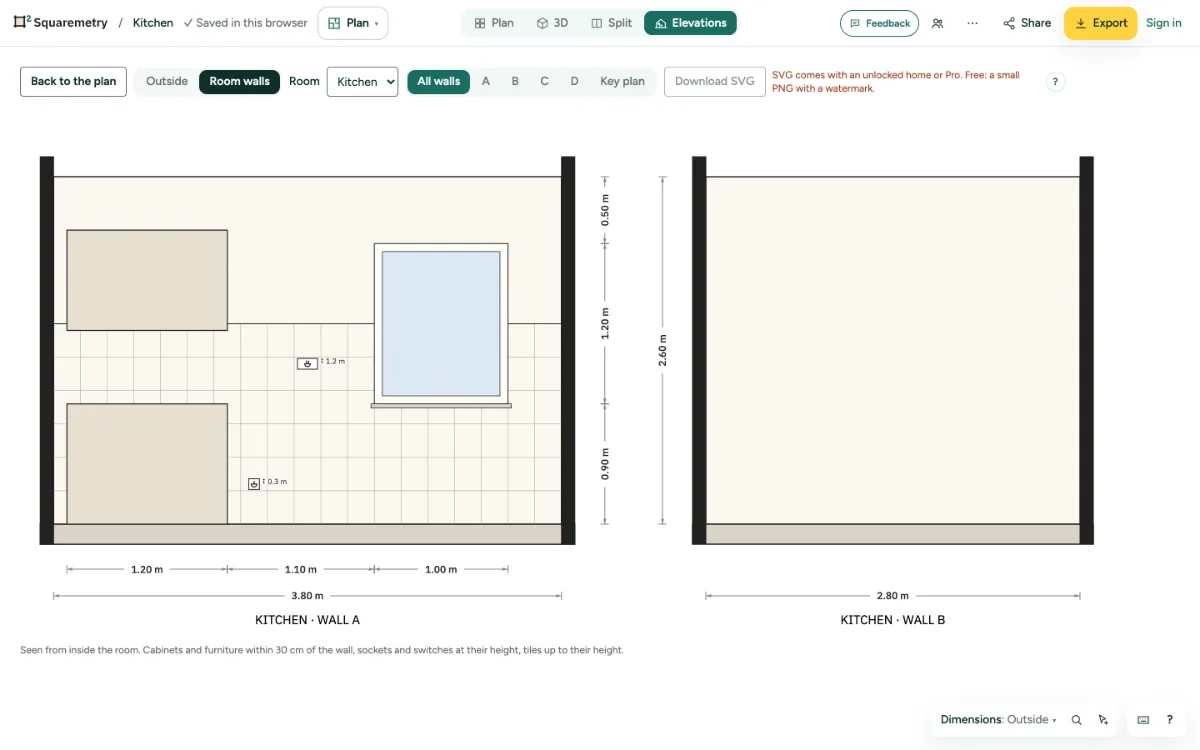
Every wall of a room, seen from inside and to scale: doors and windows, cabinets and furniture against the wall, tiles, sockets and switches at their height, with sizes. For the kitchen fitter, the tiler or the electrician.
1. Open the room walls
Choose a room and open More, then Photos and note in the room panel on the left, and click Wall elevations. Or, in Survey or Sheets, click Elevations in the top bar and choose Room walls.
2. Pick the room and wall
Pick the Room from the list. All walls shows every wall with its letter (A, B, C ...) and the Key plan; click a letter to see one wall large. Wall A is the top wall of the room, then clockwise.
3. What is drawn
Cabinets and furniture within 30 cm of the wall at their real height (a wall cabinet hangs at its height). Every symbol from Systems that sits on a wall at its mounting height, with the height next to it: sockets, switches, taps, radiators (by their bottom), the boiler, the water meter, the manifold and the indoor air conditioner. A soil stack runs from the floor to the ceiling. A ceiling light, spot, vent or other symbol without a usual height shows once you give it a height in Systems. The height is the same as in Systems and 3D. Under the wall a chain of sizes and the length, on the sides the heights.
4. Tiles and heights
Tile a wall side in its card (Walls, the side, Tiles) with bands: tiles up to a height for a splashback, paint above, each with its tile size. Set the height of a socket or switch in its card under Mounting height.
5. Save or export
Download SVG saves what you see. In Export, tick Room walls: one page per room in the PDF, or one file per room. The DXF has its own layers for the wall, tiles, openings, furniture and symbols.
Messages you may see
- No rooms on this floor yet. Draw a room first, or open another floor.
- This room has no straight walls of 20 cm or more to show.