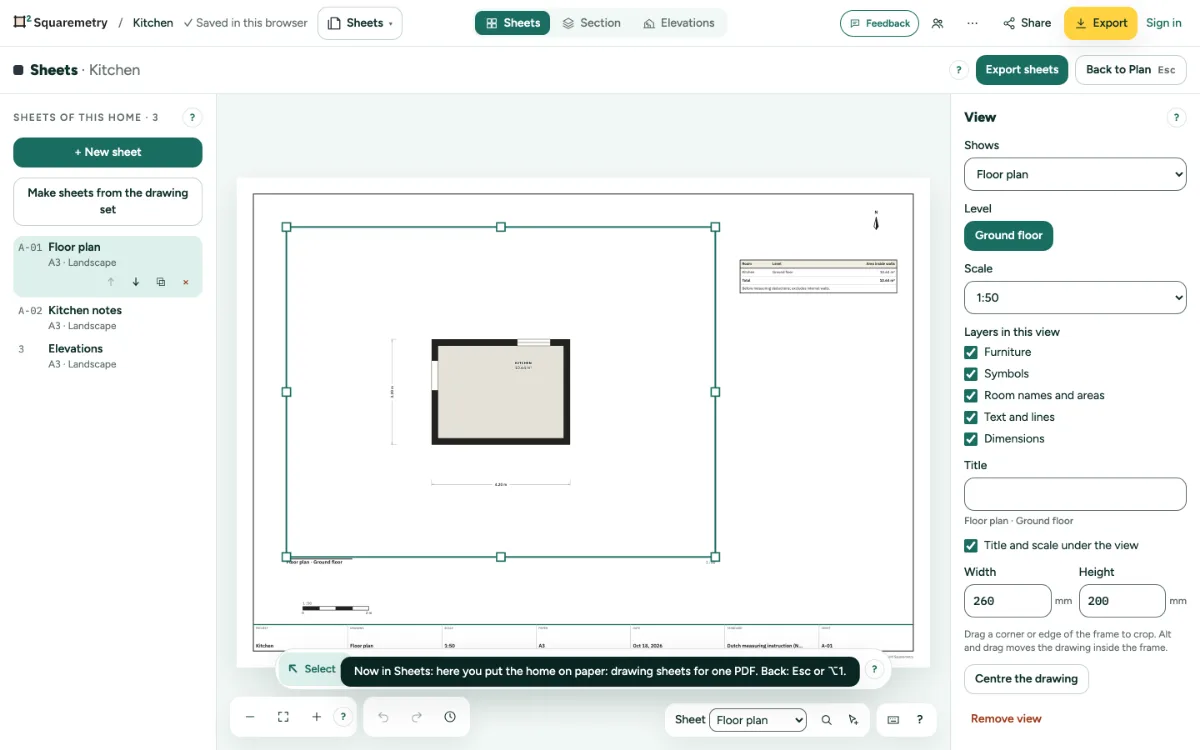
A view shows part of the plan on a sheet: a floor plan, furniture plan, electrical and plumbing, renovation, an elevation, the section, room walls, a 3D view or the site plan. Each view has its own scale, crop and layers.
1. Add a view
Click View in the tools (G), choose what it shows and which level or room, and click Place the view. It lands in the middle of the sheet.
2. Move and crop
Drag a view to move it, on whole millimetres. Arrow keys move it 1 mm, with Shift 10 mm. Drag a corner or edge of the frame to crop: at a fixed scale the drawing stays where it is. Alt and drag moves the drawing inside the frame; Centre the drawing puts it back.
3. Scale
Pick Fit in the frame, or a fixed scale from 1:20 to 1:1000; in feet and inches 1″ = 1′ to 1/16″ = 1′ and 1″ = 20′ or 40′. The title and scale stand under the view. When the drawing does not fit at that scale, the card says so and you see part of it.
4. Layers and title
Turn off furniture, symbols, room names and areas, text and lines, or dimensions for this view only. Give the view your own title, or turn off the title and scale under it.
5. Align
Shift and click to choose more views or parts, then align them left, centre, right, top, middle or bottom on the first one.
Shortcuts
- G
- Sheets: add a view
- V
- Sheets: select
- ⌫
- Delete what is chosen
Messages you may see
- At 1:50 the drawing does not fit in the frame. You see part of it. Make the frame larger or choose a smaller scale.
- This view shows a level or room that no longer exists. Choose another one.
- Type a size from 5 mm to the size of the paper.