Mark walls, doors and windows as new or to demolish. The plan draws them the usual way: existing black, new red, demolish yellow with a dashed line. The export gives the existing situation, the work and the new situation on separate sheets.
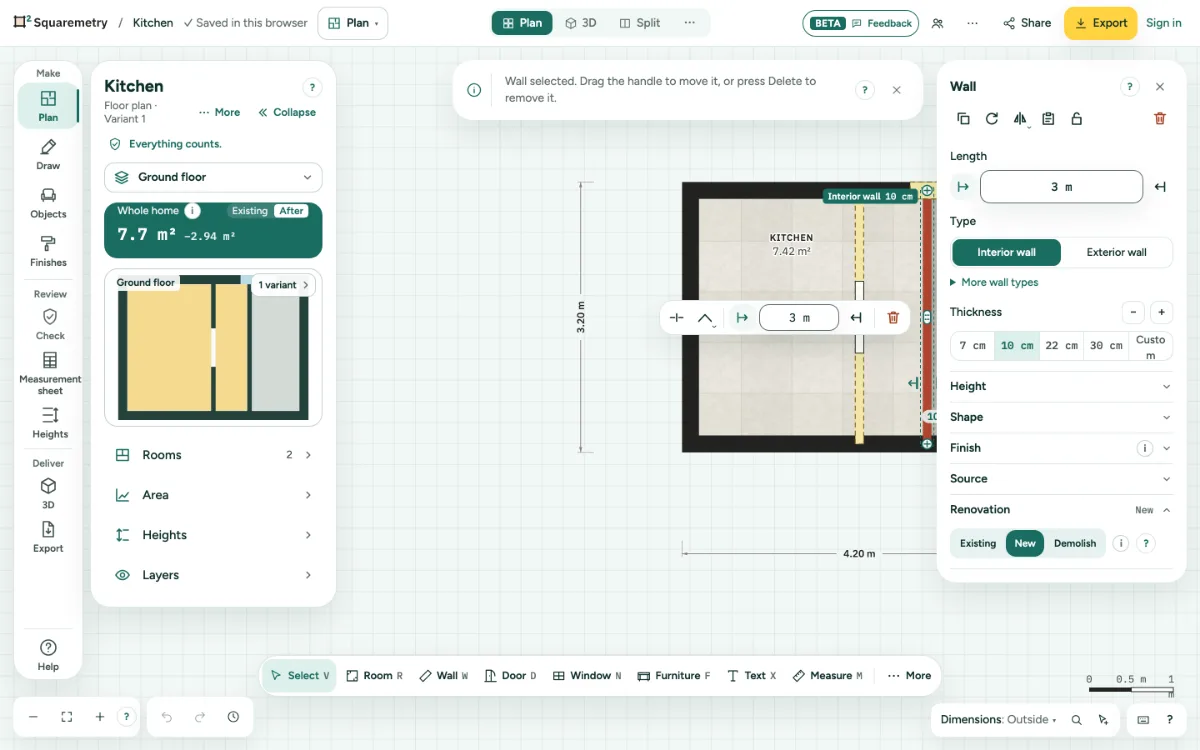
Renovation drawing: existing, new and demolish: step by step
1. Mark a wall
Choose a wall and open Renovation in its card. Pick New or Demolish; Existing takes it back. A new wall is red, a wall to demolish yellow with a dashed outline.
2. Doors and windows
In the card of a door, window or opening, Renovation New means a new opening in a wall: the part of the wall that goes is drawn yellow. Demolish means the opening is closed: new wall, drawn red.
3. What counts
The areas count the plan after the renovation: a wall to demolish does not split rooms. 3D, elevations, section and wall elevations show the new situation too. In the left panel, Existing and After in the Whole home block switch the numbers: Whole home and This floor then both show the same state.
4. Before and after
In 3D, Elevations (Outside) and the section, the choice Existing or After the works shows the home as it is now or after the renovation. A view link has the same choice in 3D. It only changes what you see, never the plan; the title block of 3D says Existing situation. Wall elevations always show the situation after the works.
5. Separate sheets
In Export, with an unlocked home, Pro or Team, tick Renovation sheets: the open floor three times, existing situation, demolition and new work (with a legend) and new situation. One page per sheet in the PDF, one file each for PNG, JPG, SVG and DXF.
Messages you may see
- Nothing on this floor is marked new or demolish. Mark walls or openings in their card under Renovation.