Drag a loose line on the plan as a note or a sketch, like the straight line but free. It never counts in the area.
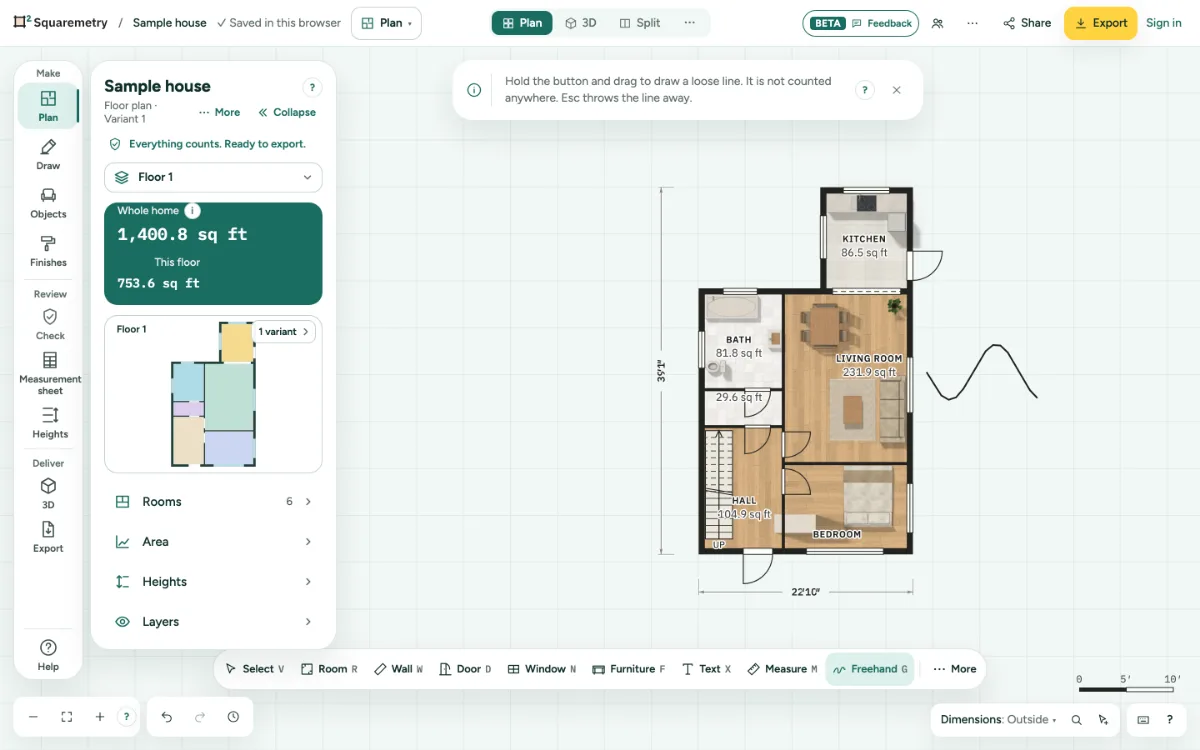
Freehand lines on the plan: step by step
1. Choose Freehand
Press G, or open More in the toolbar and choose Freehand. On a phone it is in More.
2. Drag
Hold the button and draw. When you let go, the line is made simpler to what you can see at this zoom, and it stays one line.
3. Style and move
With Select you choose the line by clicking anywhere on it. Change it to dashed, thicker or another colour, or drag it: all of it moves. Length in its card is the length as drawn; type a length and the whole line grows or shrinks from its start point, in the same shape.
4. Undo or stop
The line is one step: ⌘Z takes it away. Esc while you draw throws it away. A line that crosses itself just stays as you drew it.
Shortcuts
- G
- Freehand line
- ⌘Z
- Undo
- Esc
- Stop, then Select, then let go
On Windows and Linux, use Ctrl where the Mac has ⌘.
Messages you may see
- Line drawn. Draw the next one, or use Select to change its style.
- Too short to draw. Drag a little further.
- Stopped. Nothing was drawn.