The tape measure reads distances without changing the plan. Dimensions show sizes on the plan and in exports.
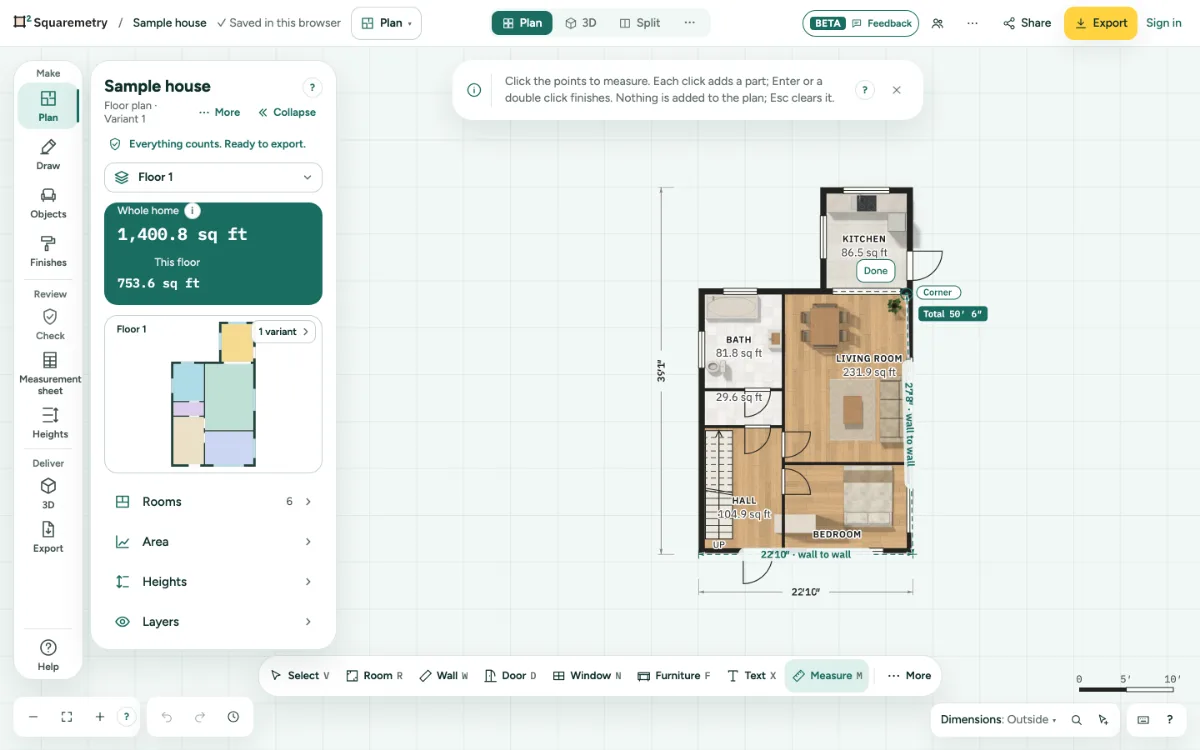
Measure and dimension lines: step by step
1. Measure
Press M, or click Measure in the rail next to the panel, and click the points. Each click adds a part and shows the total. Enter or a double click finishes; Esc clears it. Near a wall it snaps to the wall face, inside or outside, never to the centre line: a part from face to face says wall to wall. A click inside a wall takes the nearest face of that wall; a thick wall elsewhere in the plan does not pull a point away. Zoomed in far, a click within 5 cm (2 in) of a face still takes that face. Hold Alt to measure freely.
2. Keep it
Click Keep as dimension to turn the measure into a dimension line on the plan. Every part keeps its number, also a short one such as 0.50 m. A kept dimension outside the house, for example to the plot boundary, is in the SVG and PDF export too.
3. Choose which dimensions show
At the bottom right, the button Dimensions shows what is on now, for example Dimensions: Outside. Open it and show Outside, Inside, Both or None, in the Illustrated or Technical style. Chains are under How much. A plan that showed the old chains shows Outside with chains.
4. Outside: rooms and one total
Outside puts a chain of dimensions outside the house. Close to the house is the inside size of every room along that side, from the inside of one wall to the inside of the next. Walls, and steps in the facade shorter than 1 m (3 ft), are open gaps between the arrows without a number; the style Technical shows them. Only the rooms right behind that facade count. Further out is the total, once for each direction, in bold: it runs to the outside of the walls. The chain lies 1.20 m (4 ft) from the walls and the total 0.60 m (2 ft) further out, on screen never closer than a few text heights. Dimensions never run across a pond, terrace, path, tree, hedge or garden house: they move further out, at most 3 m (10 ft), and then the numbers sit above the line. A slanted wall gets its own size along the wall, in the same row as the chain. Two numbers never overlap and are never cut off: when there is no space, a number waits until you zoom in, and the total always stays. Only the house gets dimensions by itself: a shed that stands apart gets its chains when you switch on the dimensions of its room in the card. On a phone a plan starts with the totals only. Chains measures from the middle of each inside wall instead.
5. How a dimension looks
Every dimension has the same look: a thin light grey line with a small arrow at each end (Technical: a short slash, as on a construction drawing), short lines to the points it measures, and the number in the line with a light halo, without a box. The PDF says in one line at the bottom that the total is measured outside and the rooms inside. When an arrow does not fit, the arrows sit outside the line and point in. The size of a wall you choose, drag or draw is shown the same way in teal, at a fixed distance from the dotted outline. Double-click that number to type the length.
6. Sides
With Outside or Both, choose Left and bottom or All four. A new plan starts with Outside on the left and at the bottom, so each total shows once. A plan from before keeps how it looked until you choose. Under How much, choose Totals only, With chains (the start) or Also inside: then each room also shows its free width and length, unless the chain already shows that size. On a small screen, a part that does not fit waits until you zoom in; the total stays.
7. Inside as text or lines
With Inside or Both, choose Text under the name to show width × length under the name of each room, such as 3.20 × 4.10 m or 11′ 8″ × 13′ 4″. Choose Dimension lines for two lines per room. A number never sits on the name or the area: it moves along its line or to the other wall, and in a small room it waits until you zoom in.
8. One room on or off
Click a room. In the card of the room, under Size, switch Show the dimensions of this room on or off (the (i) says what it does). That room follows your choice, whatever the plan shows. Undo takes it back, and exports show the same. After Make dimensions editable it only changes the text under the name; with dimension lines it is then grey, with one line why.
9. Edit a dimension line
Click it; with a finger you can also tap just next to the line, and grab a handle the same way. Chosen, every part shows its number in teal, and a chain also its total in bold; the card lists the parts, such as 3 m + 4 m = 7 m. If a number does not fit at this zoom, the card says so: zoom in, or move the line with the middle handle. Drag the corner handles to move the measured points and the middle handle to move the line. A corner handle snaps like the tape measure: to the wall face, never to the centre line. Make dimensions editable turns the automatic ones into lines you can change. A choice in Dimensions that then changes nothing, such as Sides and How much on a plan with one level, is grey with one line why until you clear the dimension lines. Show and Inside as still change the text under the names, Show also the inside dimensions in 3D, and Style still works. Moved a line away? Put back in its card lays it back onto the wall or room it measures. The card does not hold the style: that applies to all dimensions, and Change in Dimensions opens it.
Parts on the screen
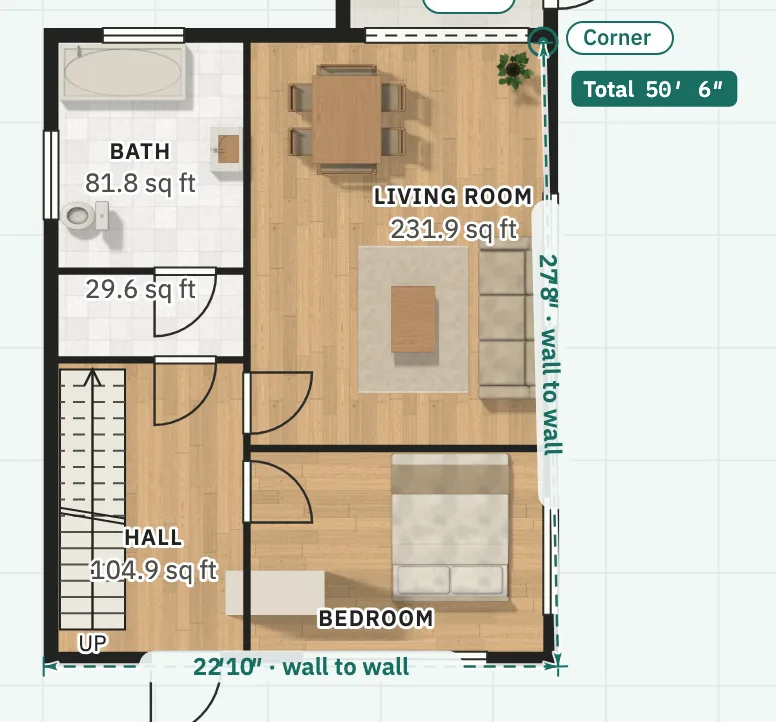
Tape measure. Each part of the measure with its length, and the total. Nothing is added to the plan.
Shortcuts
- M
- Measure
Messages you may see
- There are no automatic dimensions to convert. Choose Outside, Inside or Both first.
- Dimensions are fixed for the report. Unlock them under Layers to change them.
- This size runs along a slanted wall. Type the sizes in the chain next to it, or drag the corner of the wall.