Place a door or a window on a wall with one click, then set its type, width, height and which way it opens.
Add doors and windows: step by step
1. Place a door
Press D, or choose Door, and click on a wall. The door snaps to the middle and stays at least 4″ or 10 cm from a corner. It never goes across a wall that joins this wall partway along: click or drag onto such a join and it goes right beside it, and a position typed across it gives one line below the field. The other way round too: a wall drawn or moved so that it would join where a door or window sits is not made, and one line says why.
2. Place a window
Press N, or choose Window, and click on a wall.
3. Pick the type first
When you choose Door or Window, its card opens on the right: Type with Single door, Double door, Sliding door, Pocket door, Opening without a door and Garage door, or Fixed window, Casement window and Sliding window, and the Width of that type. Pick one and click a wall: it goes in with that width, and you can place the next one right away. Esc first takes the preview off the wall; press it again to go back to Select. Your last type and width stay, also after a reload. On a phone the card is a sheet at the bottom that closes after you pick; choose Door or Window again to open it.
4. Place it exactly
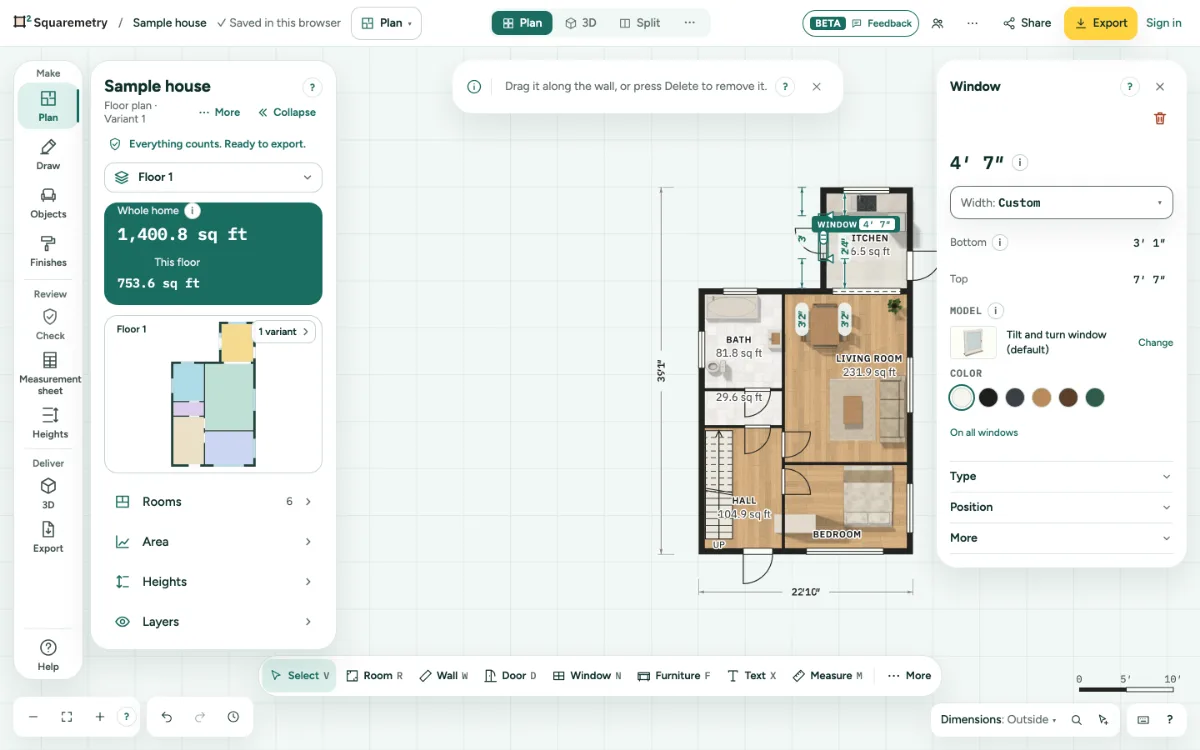
A click selects a door or window and never moves it; it only slides once you drag. In its card, under Position, type From the left or From the right: the distance inside the room, from the corner to the frame. The other side follows. Middle puts it in the middle of the wall. The plan shows the distances on both sides, inside and outside, while it is selected and while you drag; the field you are typing in is underlined there. Enter applies, Esc puts the old value back, the arrow keys move it 1 cm or ¼ in. Each change is one step to undo.
5. Set type and size
Select it. In the card, pick the Type (single, double, sliding, pocket, opening, garage; fixed or casement), the Width (one list with the usual sizes and Custom), Height, Bottom and Head. Drag the side handles to change the width.
6. Choose a model
A door or window has a model: how it looks in 3D. On the plan it stays the symbol. Under Model in its card you see a small picture, the name (with (default) if you did not choose one), Change and six colors. Change opens the models that fit its type in the panel on the left, under the heading Model for Door 0.93 m, in groups such as Interior doors and Front doors. A model that does not fit the size is gray. Click one: it is on the door at once, and Undo takes it off; Back or Esc changes nothing. Before you place, the card of the Door or Window tool has the same row, Model for new doors: every door of that type you place next gets it, and it stays your default. A door or window in the library sets the tool, the type and the model.
7. Building parts from the library
Every building part in the library has a button: Put on the selected wall (or room, window, door, roof) when it fits what you selected, Set for the home for a foundation, and otherwise Choose the Wall tool (or the tool it belongs to) or Open Finishes.
8. Color, threshold and top light
Under Color in the Model row, pick one of the six colors: in 3D it colors the door or window and, on a window or outside door, its frame too. On all windows (or On all doors) gives every window or door on every level that color in one step; Undo puts them all back. Under More on a door, + Threshold puts a threshold on at once: a strip across the doorway on the plan. Remove takes it off. Top light sets a fixed pane above the door or window. Front door marks the entrance.
9. Flip it
With the door or window selected, F swings it in or out and ⇧F moves the hinge left or right. Q turns the swing a quarter further each time: left in, right in, right out, left out. A double door goes in or out.
10. Move it
Drag it; it slides along the wall and stops before the corner. Or use the arrow keys along the wall, 1 cm or ¼ in at a time (Shift for 10 cm or 1 in).
11. Delete it
Click Delete door or Delete window at the bottom of its card, or press ⌫. Undo brings it back.
Parts on the screen
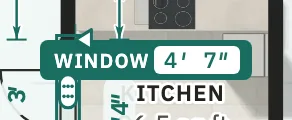
Door or window label. Shows the kind and the width of the chosen door or window, right on the plan.
Shortcuts
- D
- Door
- N
- Window
- F
- Door or window chosen: swing in or out
- ⇧F
- Door or window chosen: hinge left or right
- Q
- Turn 90°, or flip a chosen door or window
- ←↑→↓
- Move what is chosen a little (1 cm or ¼ in)
- ⌫
- Delete what is chosen
Messages you may see
- Click on a wall to place a door.
- This wall is too short for a door.
- Too wide: this wall has room for 2′8″. Pick a narrower width or a longer wall.
- Too close to the next door or window. Keep 4″ between them.
- This opening does not swing.
- Another wall joins this wall here, so a door or window cannot go there. Pick a spot beside it.
- Not done: another wall would join a wall where a door or window sits. Move the door or window first, or let the wall join beside it.