Click inside a room to open its card, on the other side of the panel with the lists, like any wall, door or item. Name, type and the height of the ceiling decide whether it counts toward the total.

Rooms: name, type, ceiling and floor: step by step
1. Open the room card
Press V and click inside a room. Its card opens with the area inside the walls and the perimeter, the Name and the Kind, and groups for Size, Floor, Ceiling and height and What counts. The panel on the left keeps its lists. On a phone the room opens as a card in the sheet. For an Attic under the Dutch measuring instruction, open What counts. Enter measured clear glass in m², without frames, including facade and roof windows. Zero stays zero; leave it empty and the roof windows on the drawing are used. Choose whether a fixed stair is confirmed, absent, or taken from the drawing; choosing the stair does not fill in the glass. Ceiling height and suitability for living still matter; glass and a stair alone do not prove the intended use.
2. Width and depth
In a rectangular room, open Size in the room card, type the Width or Depth inside the walls and press Enter. Choose which side stays, as for a wall. The walls on the other side move; where a wall runs on past the room, only the part along this room moves. Fixed size keeps the width and depth: drag one of its walls and the whole room moves along. A small lock next to the room name shows it; click it to see what is locked and to unlock it. If you remove a wall section and later close the room again in almost the same place, it gets back its name, kind and other room details. The plan remembers where the room was, so this also works after a reload or after switching floors. Undo and redo preserve it. A clearly smaller or larger room there starts without a name. The fixed width and depth are inside sizes: a facade that gets thicker outwards does not change them.
3. Name and type
Type a Name in the room card and pick the Kind from the one list: open it, type to search, or use the arrow keys and Enter. At the top of the list you filter by set (House, Apartment, Office, Shop, My set); below, the kinds stand in groups Living, Utility and storage, Outside and Other, and every kind of room stays in the list. The kind also becomes the name on the plan and in the export, when the name is empty or still the previous kind; a name you typed yourself stays. Add your own kinds in Settings, My defaults. The kinds used most in this plan are at the top; on a phone you get the list of your phone. Kinds come in sets for a house, apartment, office or shop, and your own set.
4. Where the name stands
The name and area stand at the roomiest spot of the room, away from furniture and the stair, with a white edge so they read over wood and tiles. In a narrow room, or when you zoom out, the name goes over two lines and then only the area shows, so the text stays inside the walls. The export, the shared link and the PDF do the same.
5. Wall height and ceiling
Every room has a Wall height: from the floor to the top of its walls. By default that is the height of the level, and the ceiling sits there too. Open Ceiling and height in the room card. On the top level you may type a different Wall height: higher lifts the walls and the flat roof of that room (a step in the roof), lower takes them down. Under another level the Wall height is fixed, because the walls carry the floor above; the card says so in one line, with Heights to change the level. Lowered ceiling is a choice on top: switch it on and type Ceiling at, never above the Wall height. Below it, Shape offers Flat, Sloped (lowest point and low side, roof windows), Tray or Vaulted. The area table always uses the ceiling, never the walls. Leave Wall height empty to go back to the level; a ceiling that hung higher comes down with it. A Wall height below a door or window in one of the walls is refused, with the limit in one line. When the walls or the ceiling go lower, the lowest point of a slope and the edge of a tray or vault come along, so they stay below the ceiling and above the floor. When a lower level cut off a Sloped or Vaulted ceiling, the card says so in one line: the slope or arch runs on to its old height and the ceiling is flat from Ceiling at. Changing Ceiling at, Lowest point, Low side or the sides keeps it that way; Straighten the slope (for a vault: Lower the arch) makes it an ordinary slope or arch up to Ceiling at, and Undo brings it back. A size that does not fit stays in the field with one line below it saying why; nothing changes, and Esc puts the current size back. Or search Wall height and ceiling with ⌘K.
6. Move the 1.50 m line
Under a sloping roof or ceiling, the clear height of 1.50 m falls where the roof outside puts it. Is the inside finish different (boarding, insulation inside, a lowered ceiling, a knee wall)? Then move the line. Open Ceiling and height in the room card: Height lines shows the distance to the wall on each side with a slope, and the computed distance below it. Type a distance and press Enter, or drag the handle on the dashed line on the plan, in whole centimetres. Back to computed puts the line back. The area lower than 1.50 m, the survey sheet, the section and the report follow the line, and the report says the line was moved by hand. Or search Move the 1.50 m line with ⌘K. Only with the Dutch measuring rules.
7. Floor
In the room card, open Floor. It has one row: a swatch, the name of the floor and Change. Click Change to pick a colour, a floor from the library or your own photo; it shows on the plan with its real look at true size and does not change the area. Until you choose, a room gets a floor that fits its type: wood in a living room, tiles in a bathroom or kitchen, concrete in a garage. The row then says Default.
8. Furniture list
Which furniture stands in each room, with size and count, is in the Furniture list. Open Furniture and click Furniture list at the top of the library.
9. Delete the room
Click Delete in the row of icons at the top of the room card, or press ⌫. Its walls go, except a wall it shares with another room. Undo brings it back.
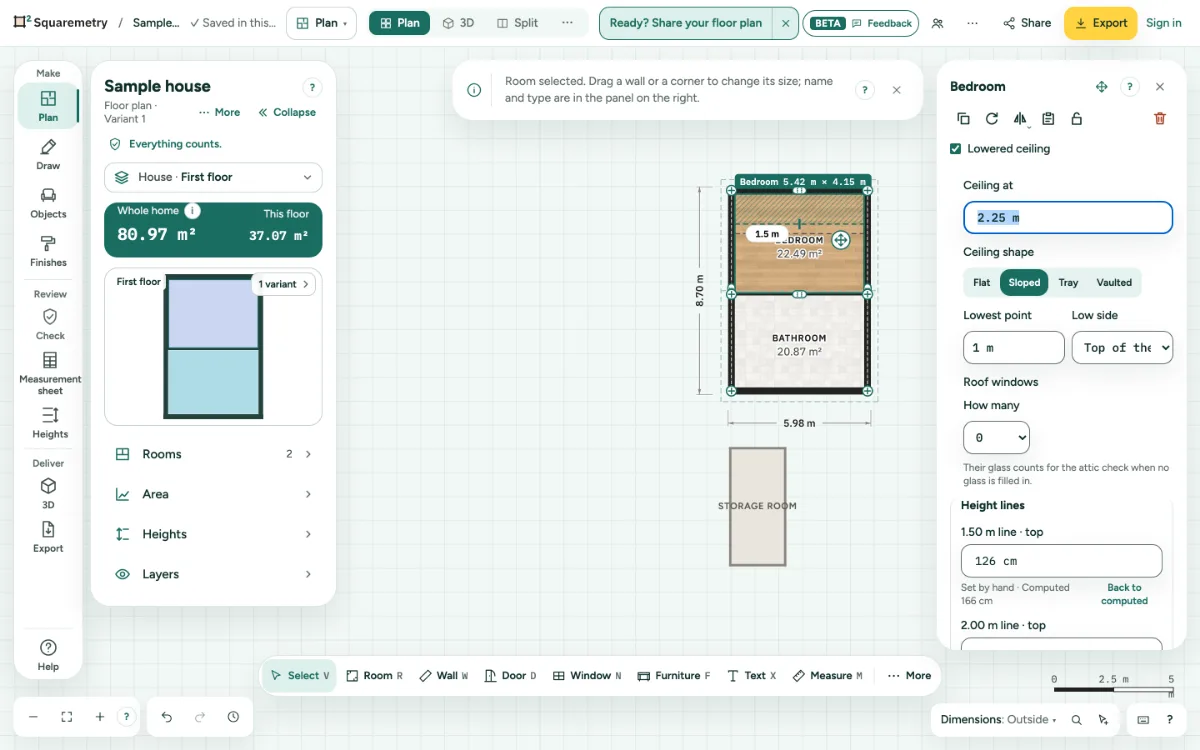
Parts on the screen
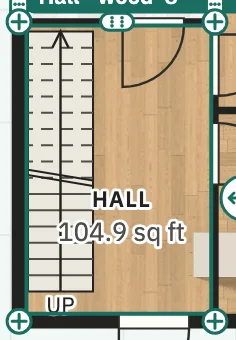
Chosen room. A chosen room is outlined; its card with name, type and ceiling is on the right.
Shortcuts
- V
- Select
- ⌫
- Delete what is chosen
- ⌘K
- Search tools, actions and help
On Windows and Linux, use Ctrl where the Mac has ⌘.
Messages you may see
- Width and depth can be typed for a rectangular room. Drag its walls instead.
- Counts
- Does not count
- The lowest point must be lower than the highest point.
- Room 1 deleted. Undo brings it back.
- Every wall of this room also belongs to another room. Delete one of its walls instead.
- Choose a room under a sloping roof or ceiling first.